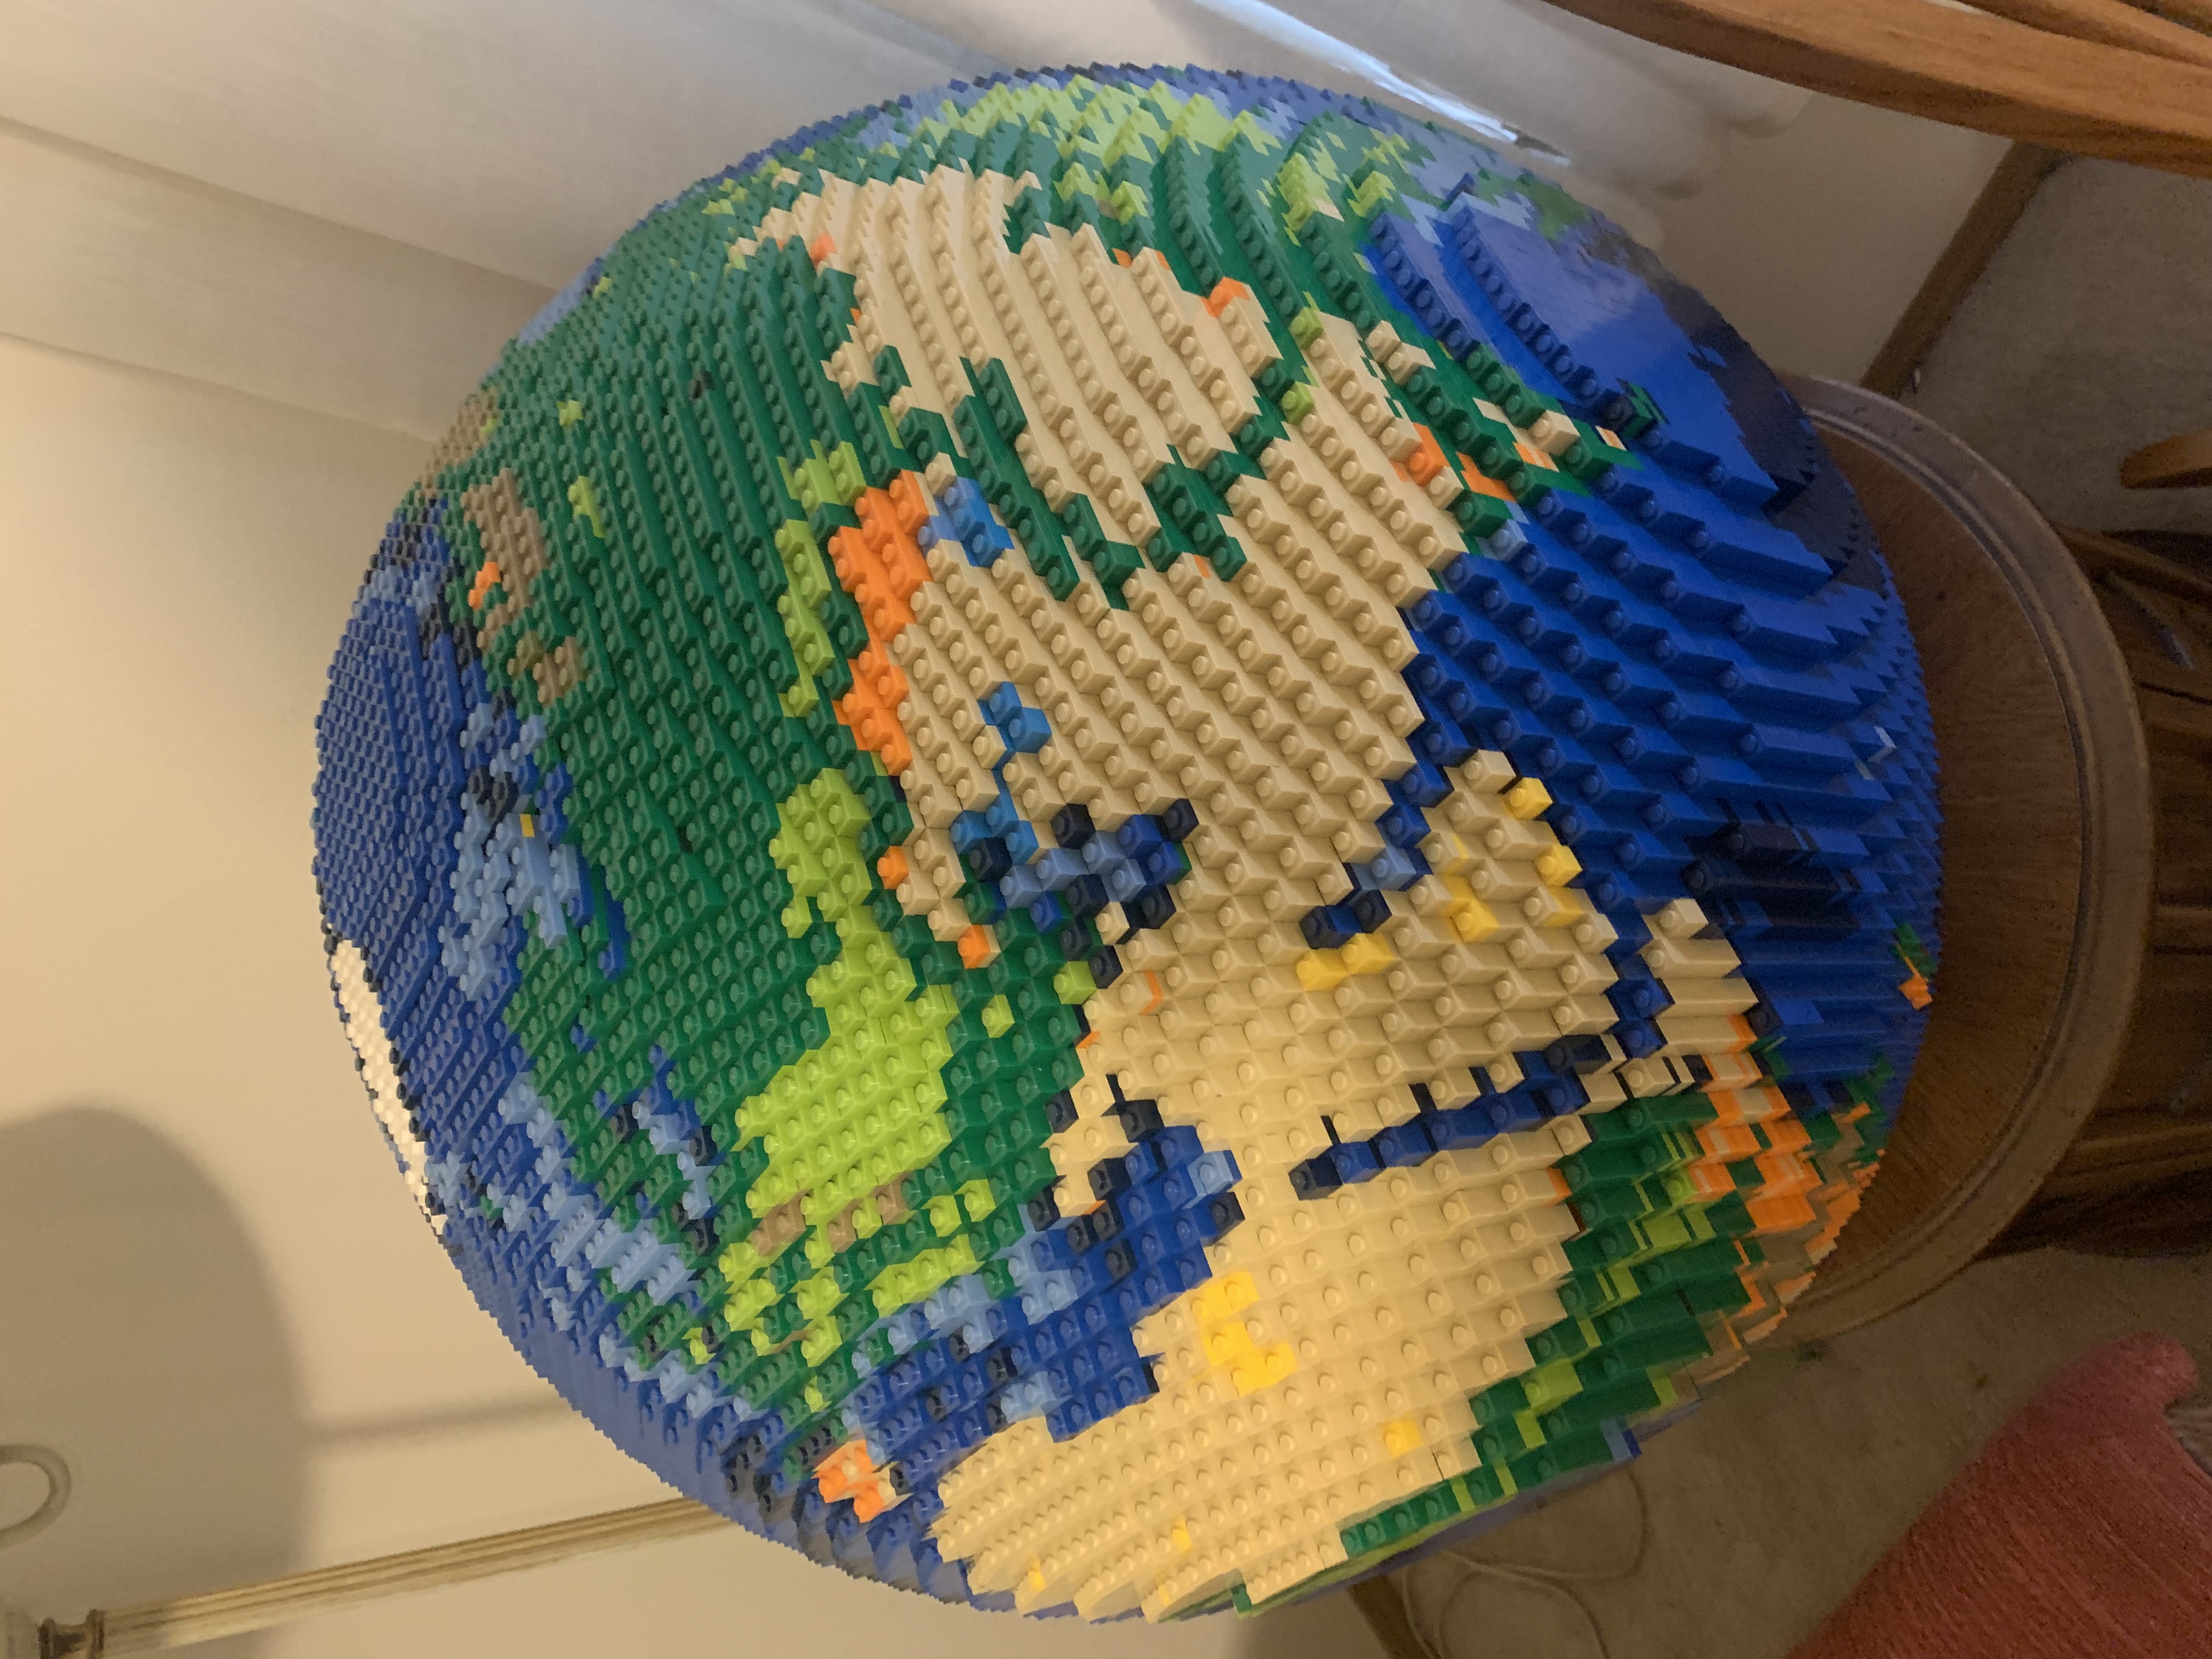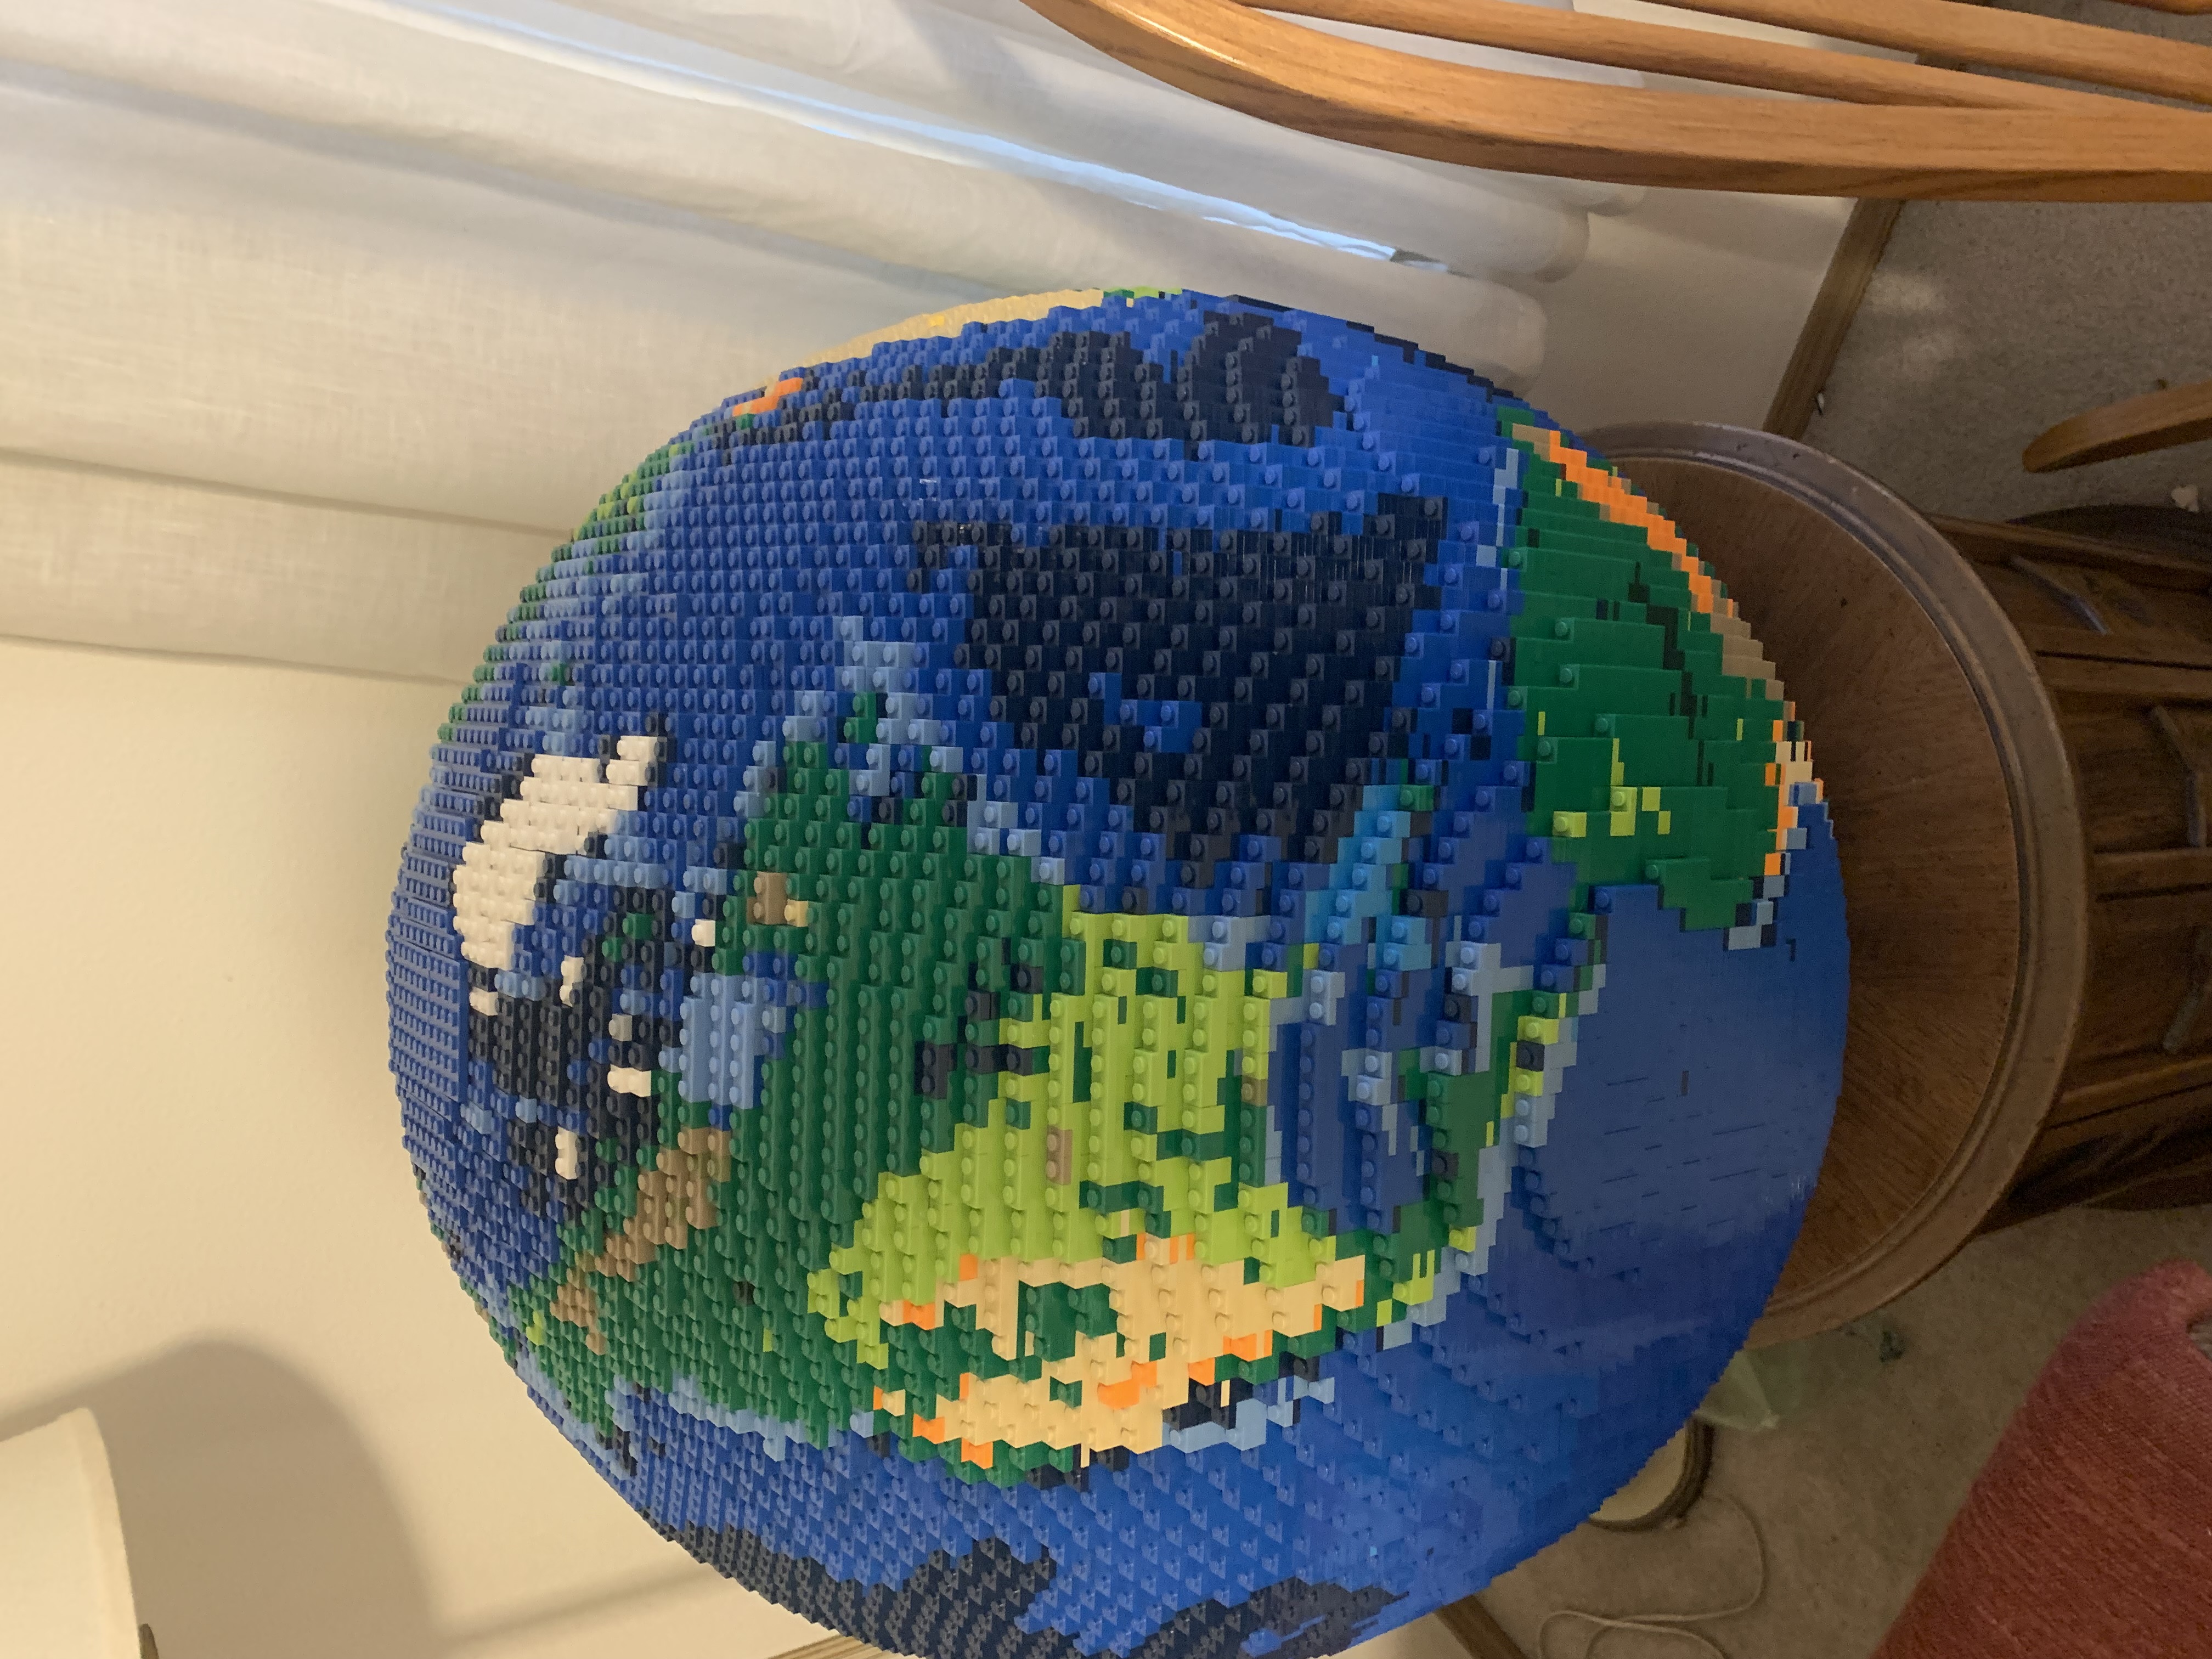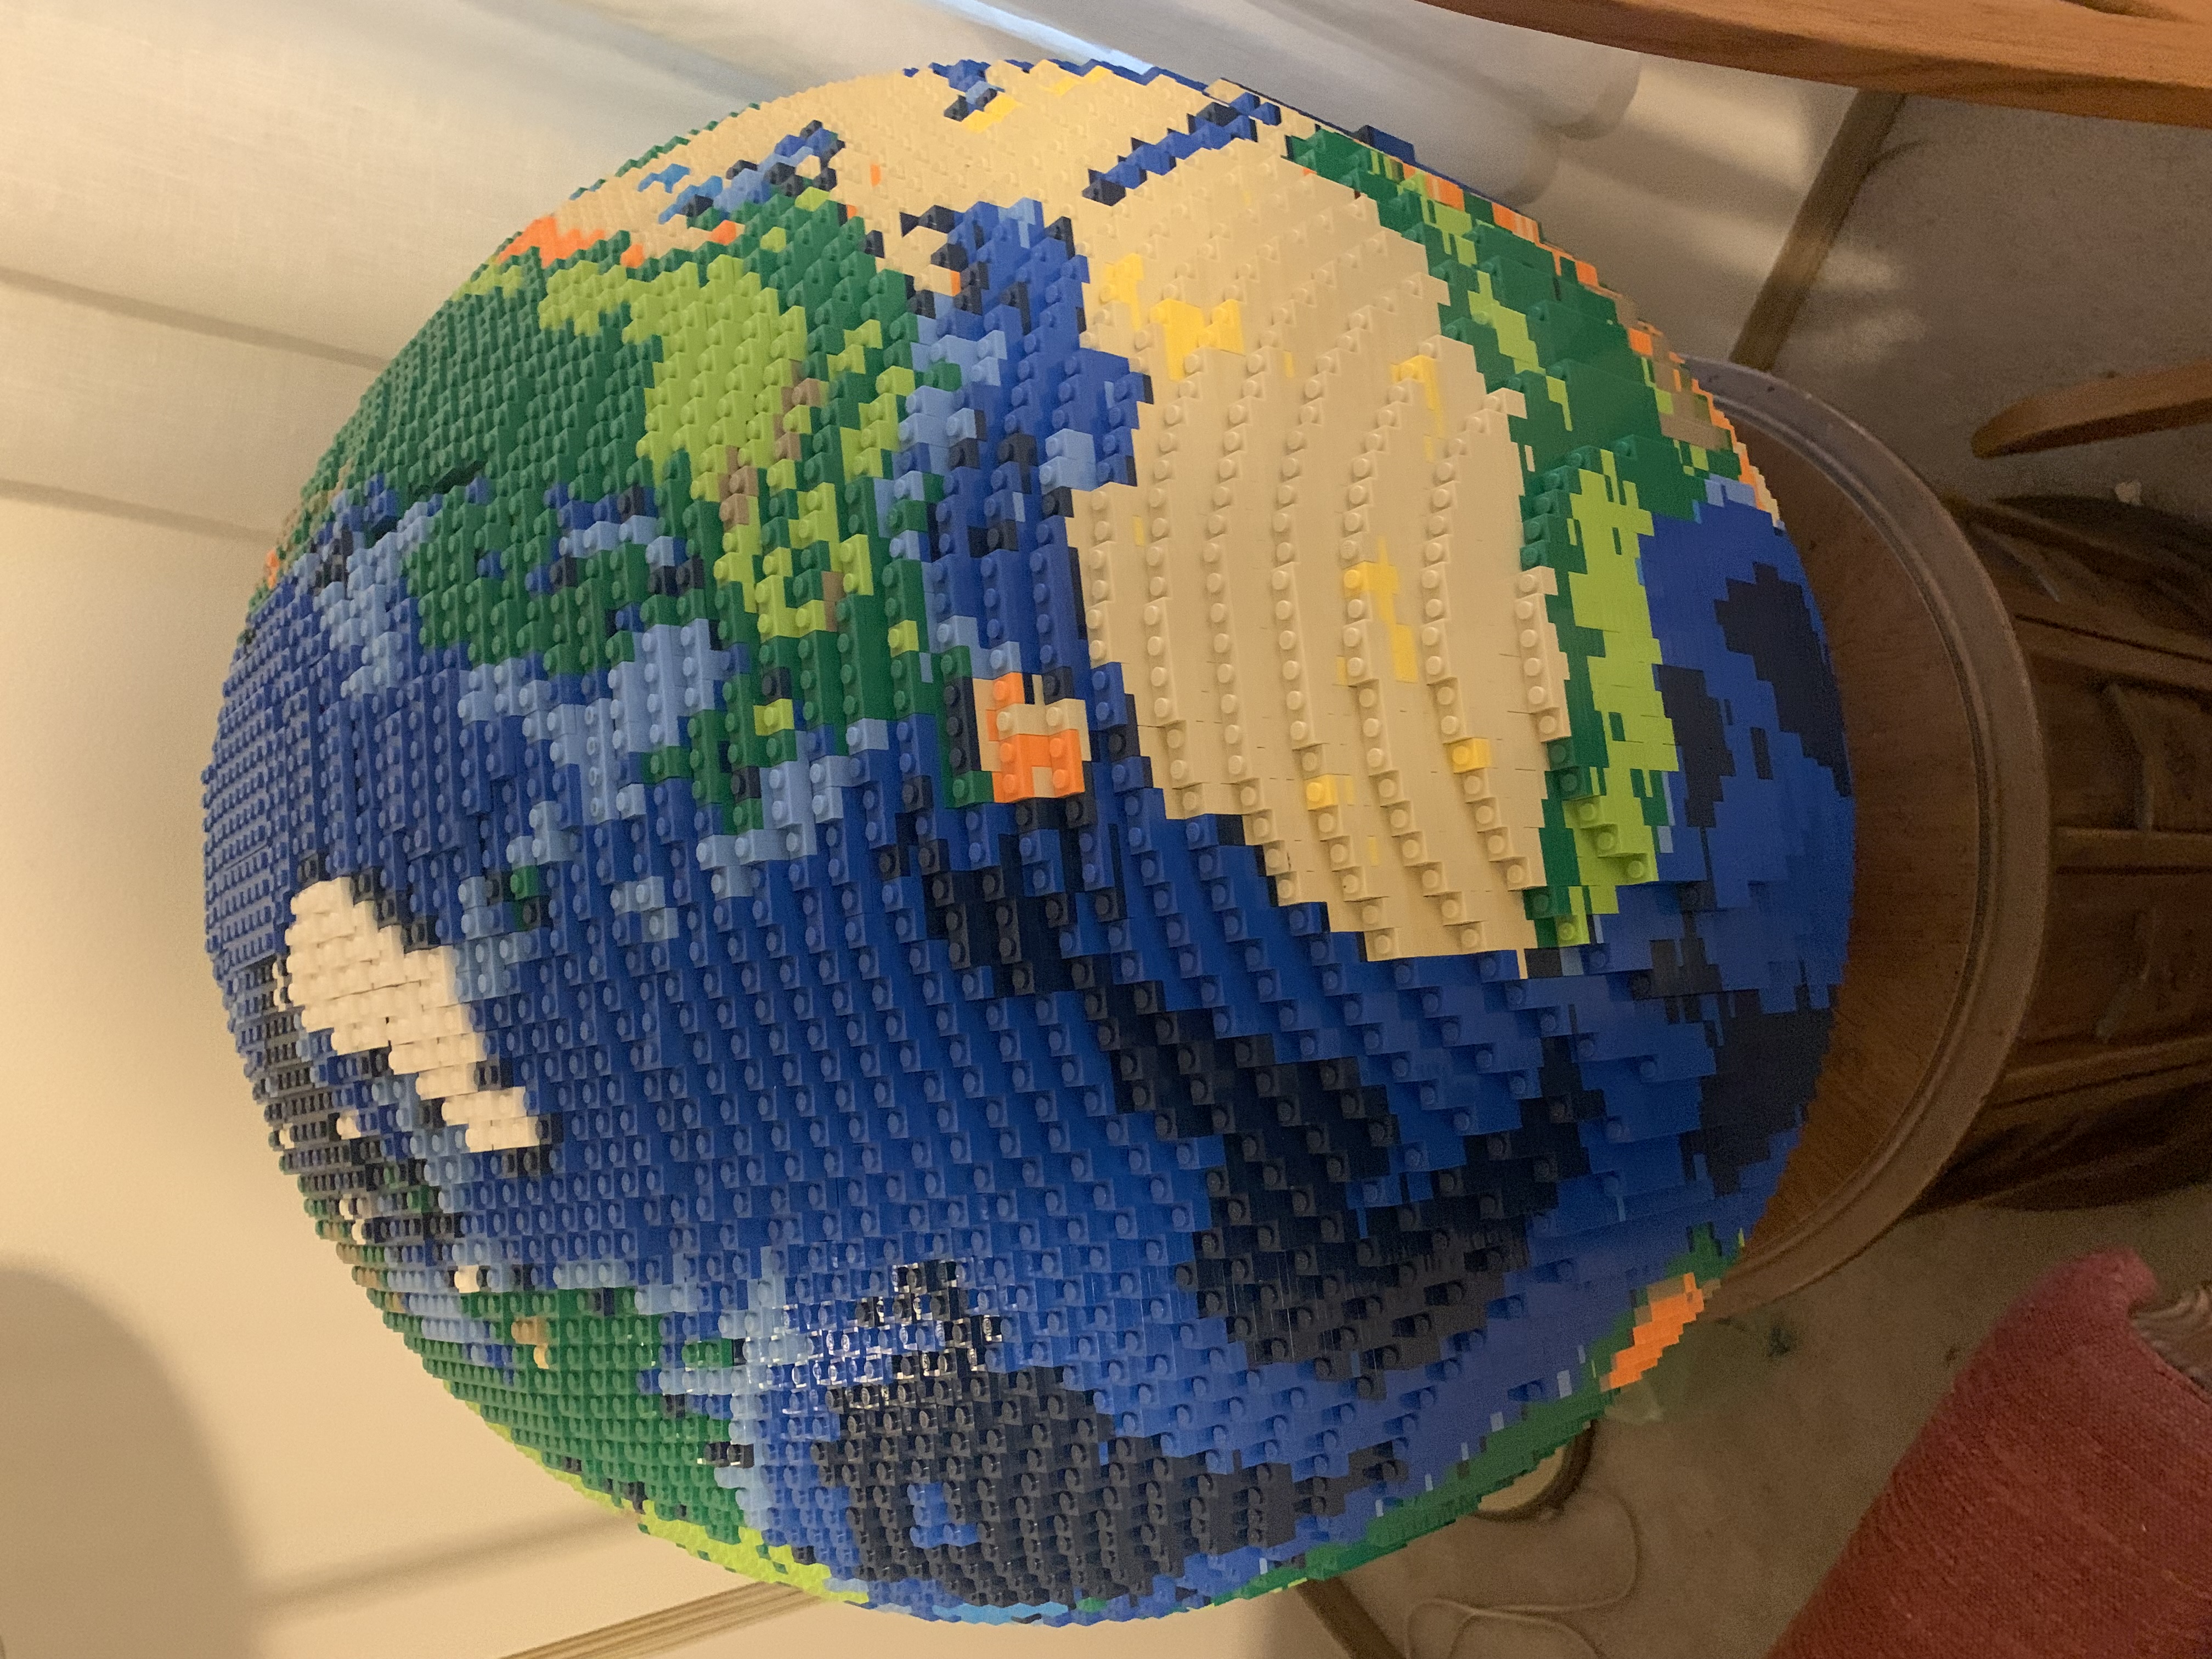
I have been working on a Lego World Globe for 5 years. In 2001 I built a Solid Blue Lego Sphere, since then I have been thinking about how to build a Lego Globe using a world map. A lot of people build globes using Lego, most of the time they use bricks, I liked the resolution of using plates. When I started Lego did not sell many colors of plates, but last they expanded the amount of colors and plate lengths they offer.
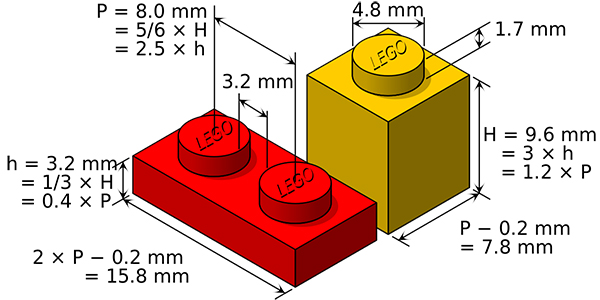
A Lego plate is 3mm high and 8mm wide.
I started by figuring out how big of globe to make. I decided that 600mm would be a good size of globe. This would make the hight of the globe 200 plates high, and 75 plates wide at the equator. I added one more plate to the width of the equator to make it 76 plates wide. This would make the radius of the globe 38 plates wide.
First I cut the globe into slices. The real globe is 100 slices per hemisphere, for this example I'm only going to use 4 slices. If I just cut the globe into 4 equal parts the map of the globe will not fit on the globe correctly. See the southern hemisphere of the figure to the left. The divisions have to be made where the slice intersects the globe. To find these angles I used the following equations:
In the example to the left, the radius of the globe is 4 units, the first slice is 1 unit high. To find the angle, divide 1 by 4 to get .25. Then find the asin of .25 to get 14.48 degrees.
I used this method on the globe, however my radius is 300mm and each slice is 3mm tall.
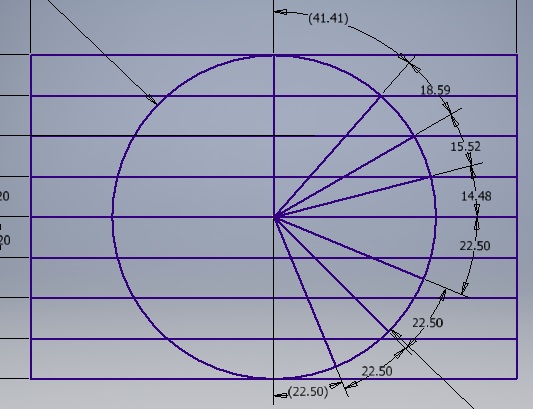
For the Latitude slices I’m going to use a globe 60mm with 3mm slices. For each slice I need to find the radius, good ol’ Pythagorean theorem will be used:

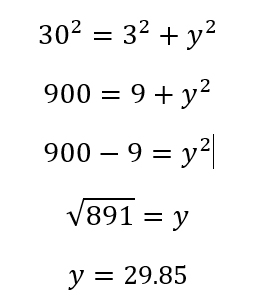
So for a globe that is 60mm in diameter, and 3mm slices I have 20 slices. Fortunately, the North Hemisphere is the same as the South Hemisphere. So here are the ten slices for a hemisphere.
| Slice | |||||||||||
| Raduis |
Once I know the radius, I need to figure out how many bricks to put for each brick in radius.
I’m going to use slice 7 and a radius of 21.42. Basically I’m going to use the Equation from the division cutter. Use the radius for the hypotenuse, and then 4mm for the first brick, 12mm for the next, and 20mm for the last. This will define the quarter of a slice.
For the whole hemisphere here are the number of bricks:

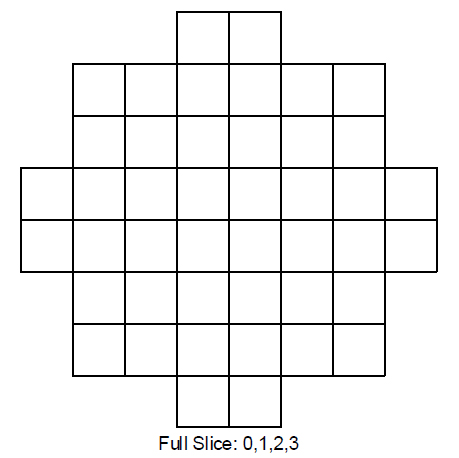
Taking slice 0 and expanding the quarter slice to the whole slice.
I now have defined every piece in the globe. I must now map those pieces onto the world map. The first part of this is finding the longitude and latitude of each piece.
For the latitudes, I just used the slices from above. The longitude is a bit harder. First the longitude of every exterior vertex needs to be found. Then any exterior corners is removed because these pieces need the same color on both sides. There are 14 different types of sides.
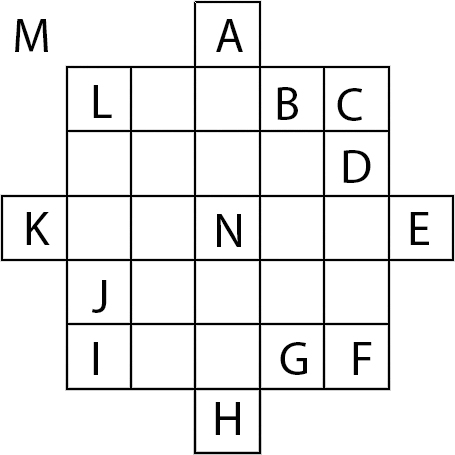
Types of pieces:
1) Outside pieces not a part of the globe (M)
2) Inside pieces not seen (N)
3) Pieces that only have one side showing (B, D, G, J)
4) Pieces that have two sides showing (C, F, I, L)
5) Pieces that have three sides showing (A, E, H, K)
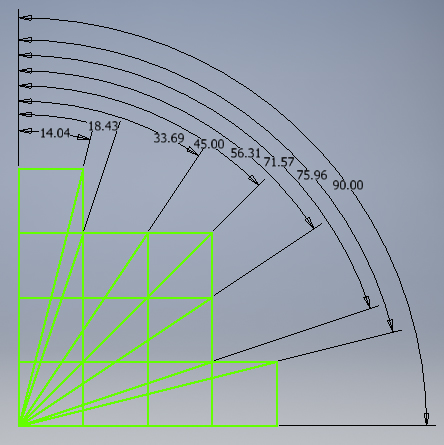
All of the longitudes
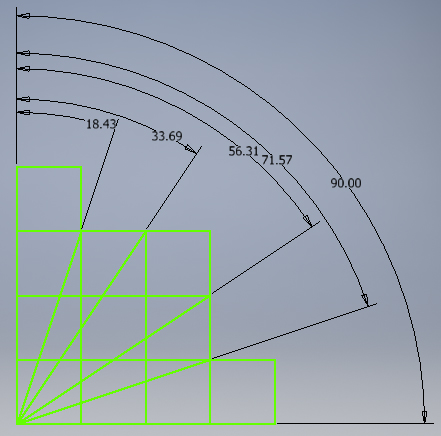
Longitudes for pieces
So for slice 0 in the northern hemisphere, the latitude will be from 0 (equator) to 5.74 degrees North. The first brick is from 0 (meridian) to 18.43 degree East, then the next brick is from 18.43 degree East to 33.69 degree East. And so on.
Now that I know all of the latitude and longitudes, I must map them onto, well, a map. I needed to know what map projection I would be using in order to display the section of the earth that corresponds to the piece. I chose the same projection that NASA uses in their world wind project. They have a never high resolution bitmap in the project. The projection they use is the equirectangular projection, which is a very useful projection for programs to use.
To find a location on the map, The equations are:
Y = Latitude
X = (Longitude) x COS(Latitude)
Using these equations and the size of the bitmap I found the chunk of map for each piece.
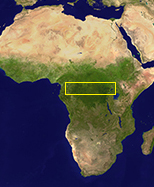
It's basically a piece of Africa. Mostly dark green. So I would use a green block for it.
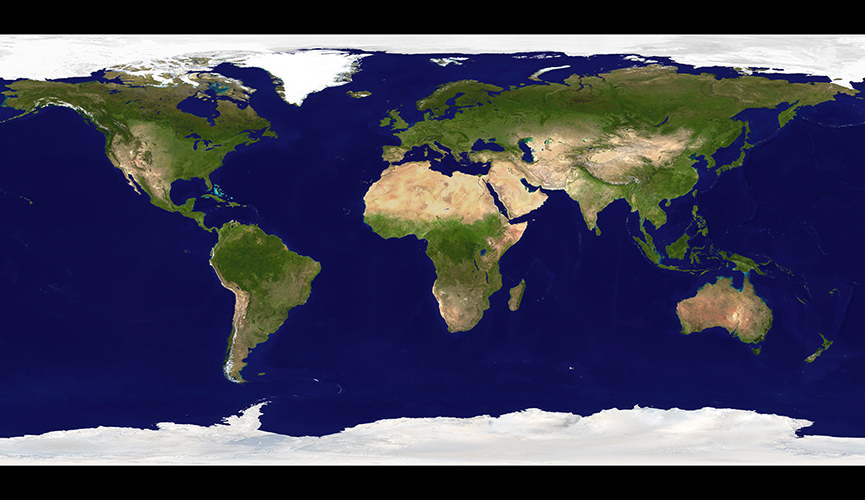
Equirectangular projection of the Earth
I was planning on a program that would do all of the heavy maths, then show me a picture of the globe and I would then decide what color each price would be. However, once I started to realize how many pieces that would be, and how much ocean the world has I need to automate the selection. I started to use a hystograph of the block of the earth, then I hashed that hystograph. I would assign a color to the hashed value, then any block that hashed to that value the program used that color of block. Then the program would find the next unassigned hashed value for me to set the color of.
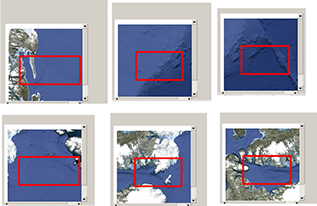
Examples of blocks I would have problems with deciding colors
At first I used the NASA bitmap of the world as the input map, however this was not working very well. I felt that my judgment of which color the block should be was getting in my way.
I then stylized the world to highlight colors I wanted to use.
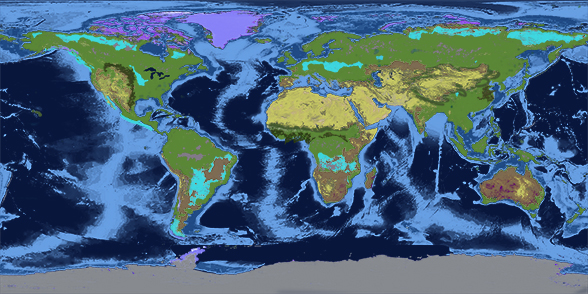
Color seperated earth
Each color layer then would be ran through the program, the white blocks would remain unassigned. The small amount of colors would be run first, then each the larger layers until the dark blue would be left.

Sand yellow layer of the earth
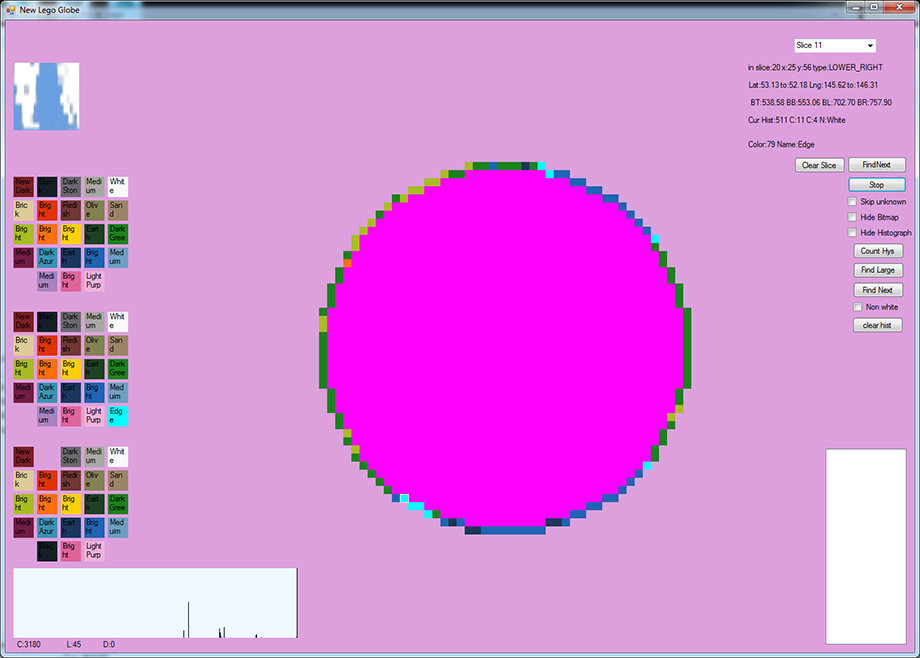
Program for selecting what color brick goes on the edge
This is the work horse of the globe. This program assigns the color brick to the outside edge of the globe. The upper right section tells me what slice the program is working on. It also highlights which block I'm working on. The upper left block shows the picture of the section of the map I'm working on. The bottom left shows the hystrograph of the map block. Once a block is shown I will use the upper list of brick colors to assign the color. The color is then connected with the hystrograph of the block. Once this association is made, any block with the same hystrograph will be assigned the color.
To manually change a block and just a block, select a block and select a brick color from the second group. The last group of brick colors clears all the blocks of that color from the globe. It's sort of a global erase.
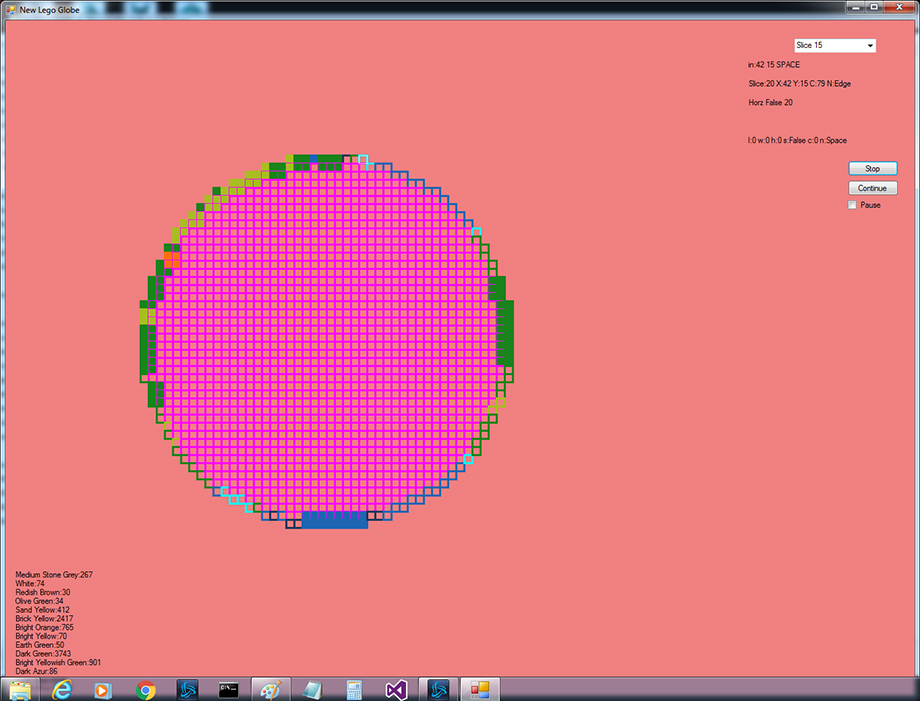
Program for selecting the Lego plate for the color.
This program selects the plate to use for the color of the brick. This program tries to fit the Lego in horizontally for odd slices, vertically for even slices. This swapping tried to build the most robust globe. The program will work a plate by plate until it finishes all the plates, or it will get into a loop of trying to fit pieces. If it hits a loop then I have to stop the program, find the color block that is having a problem, close this program down, open the first on and change the color by hand. Save that off, then start this program again.
Program for generating the Lego model
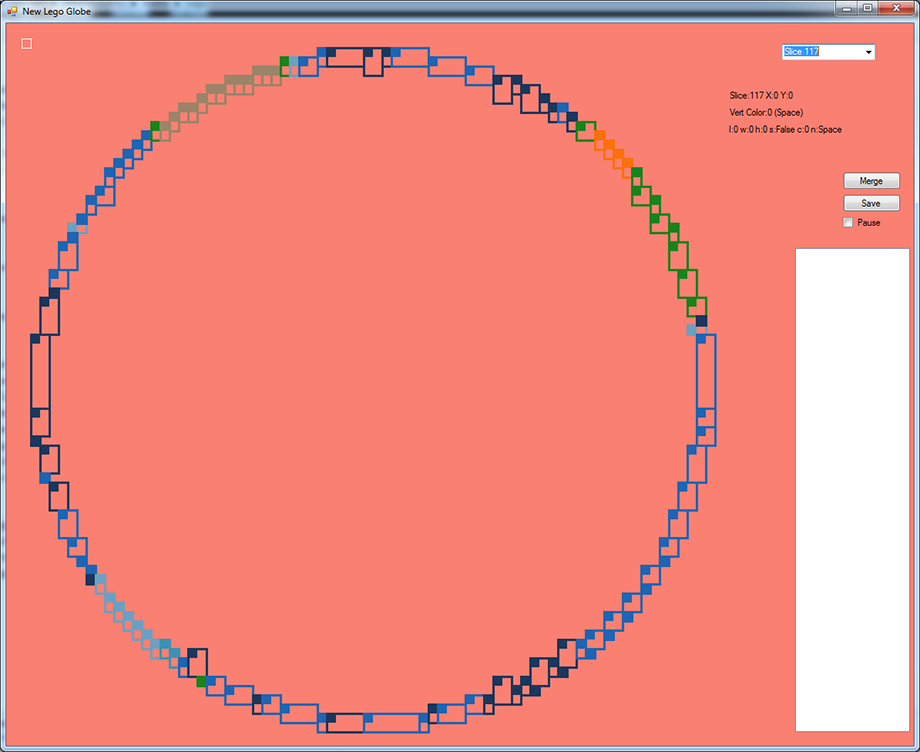
Once all the plates are assigned, this program will try to combine three plates into bricks. Once this is done it will generate the full Globe model for Lego's Creator tool. It will also build 200 slices of two layers each. The two layers will tell me what the last layer is and what the next layer should be. The full model will tell me what pieces to buy.

A slice in Lego Designer
This is what one slice looks like in Lego Designer. I follow the bottom layer as a guide and build the top layer. Notice the program does not do a great job a building, the light tan 1x1 next to the light green is 'floating' out in space. I will change that piece to a 1x2 or 1x4 to stop it from floating out in space.
